


Apple Intelligence has arrived. That means if you upgrade to macOS Sequoia on your Mac with an M-series chip, you’ll have access to a bunch of fun features to try out.
These new Apple Intelligence features are spread across macOS, from Mail to Messages to Siri and more, so expect to see them everywhere. They can help you create or rewrite text, summarize web pages and audio recordings, get smarter answers from Siri, and more.
I’ve been reviewing Macs for years, and since reviewing macOS Sequoia, I’ve had a front-row seat as all the new Apple Intelligence features roll out to Macs around the world. If you’re a little confused about the new features, these are the five Apple Intelligence features you should try first on your Mac.
How to enable Apple Intelligence
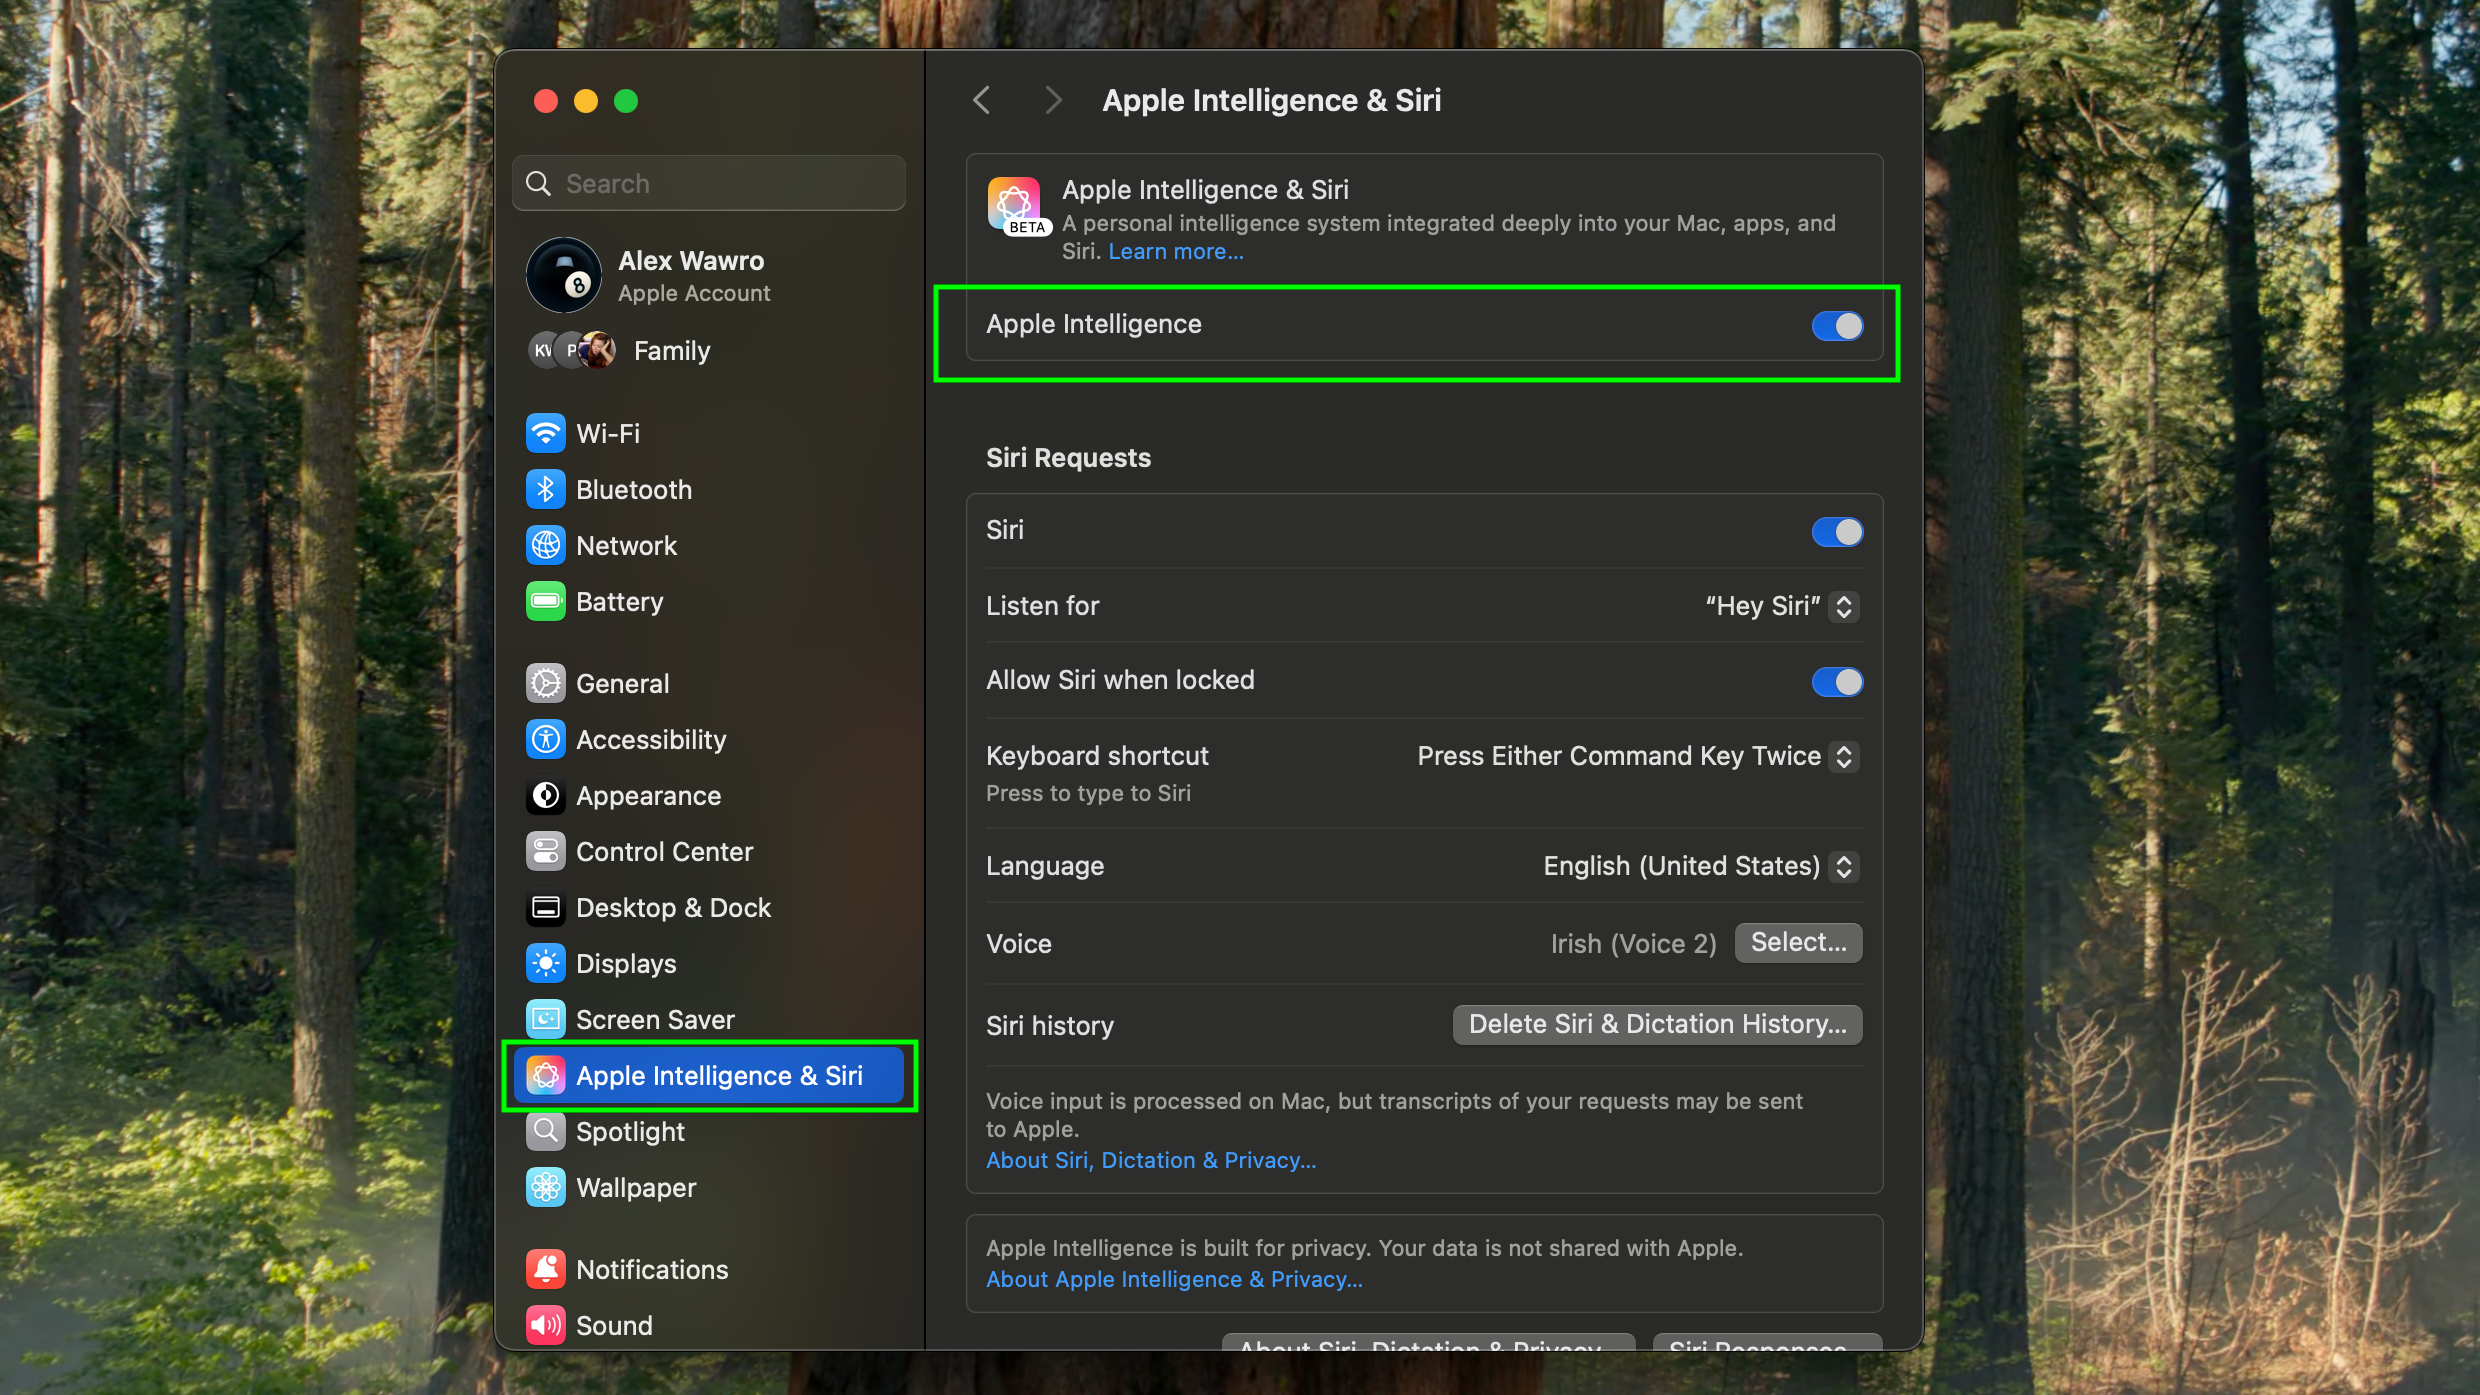
Before you start trying out Apple Intelligence, you need to make sure it’s turned on. To do this, click the Apple icon in the upper-left corner of your Mac desktop and select (System Preferences).
Once the (System Settings) menu opens, click the (Apple Intelligence & Siri) option in the left menu and make sure Apple Intelligence is enabled. If it’s not on, just click the toggle switch to turn it on and you’re good to go.
image playground

Image Playground is a new image generation tool built into macOS Sequoia, and while it’s still pretty limited, we think it’s one of the most eye-catching new uses for Apple Intelligence.
It allows you to generate images using a photo or text prompt and a number of preset adjectives provided by Apple. First, launch Image Playground (the fastest way is to launch Spotlight Search by pressing Cmd + Spacebar, type “Image Playground”, and press Enter) and enter your request.
You’ll need to choose a person (you can choose from people already in the photo, or you can give them a general set of characteristics to extract from) and an art style. Image Playground will then attempt to generate an image based on your request. You can also add additional themes provided by Image Playground (such as “Starry Sky” or “Fireworks”), but that’s about the limit of your creativity with this tool so far.
writing utensils
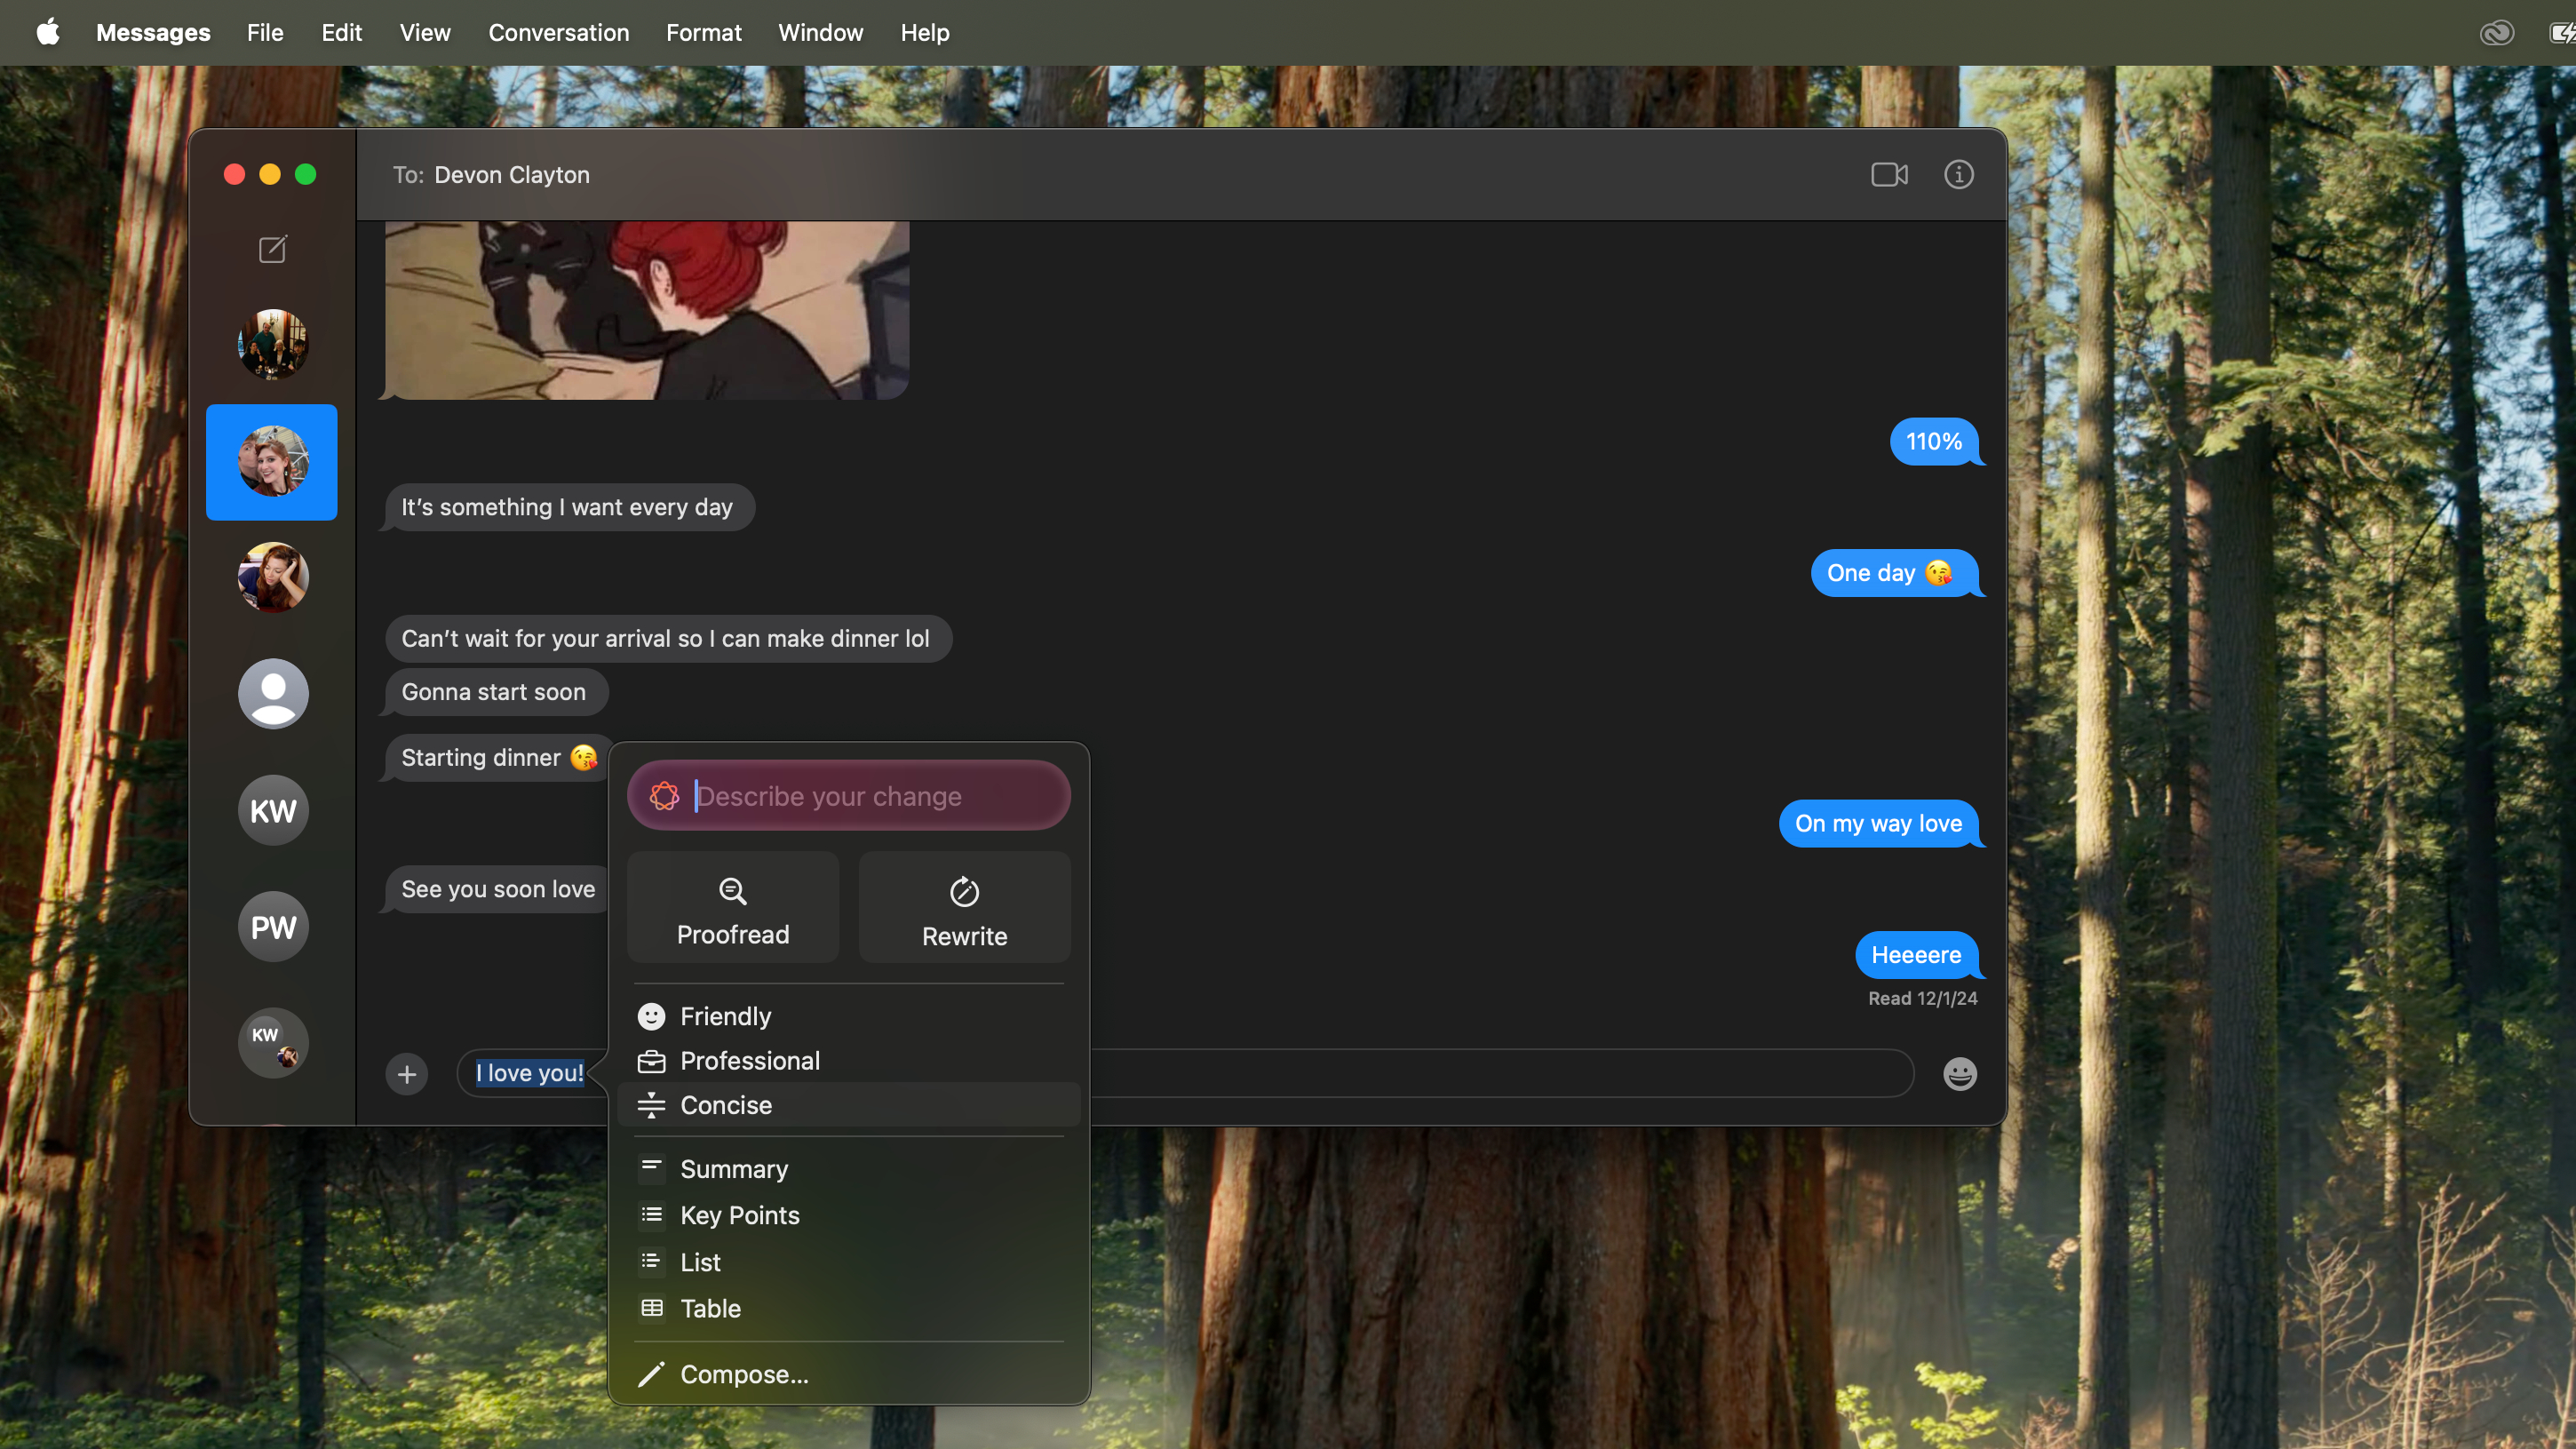
Apple Intelligence can help you generate text and fine-tune tone in several different ways. If you want to modify text that you’ve created, just select it and use Ctrl+click to open the context menu.
From there, hover over (Burning Tool) to see a list of quick options that you can use instead of pressing (Show Burning Tool) to show the full tool. Writing tools allow you to refine your text in a more “friendly,” “professional,” or (in Apple’s words) “concise” way, and you can use it to proofread and summarize your text. You can also convert your writing into lists, tables, etc.
Safari overview
You can now use Apple Intelligence to get a quick overview of the stories on your web pages that support this feature.
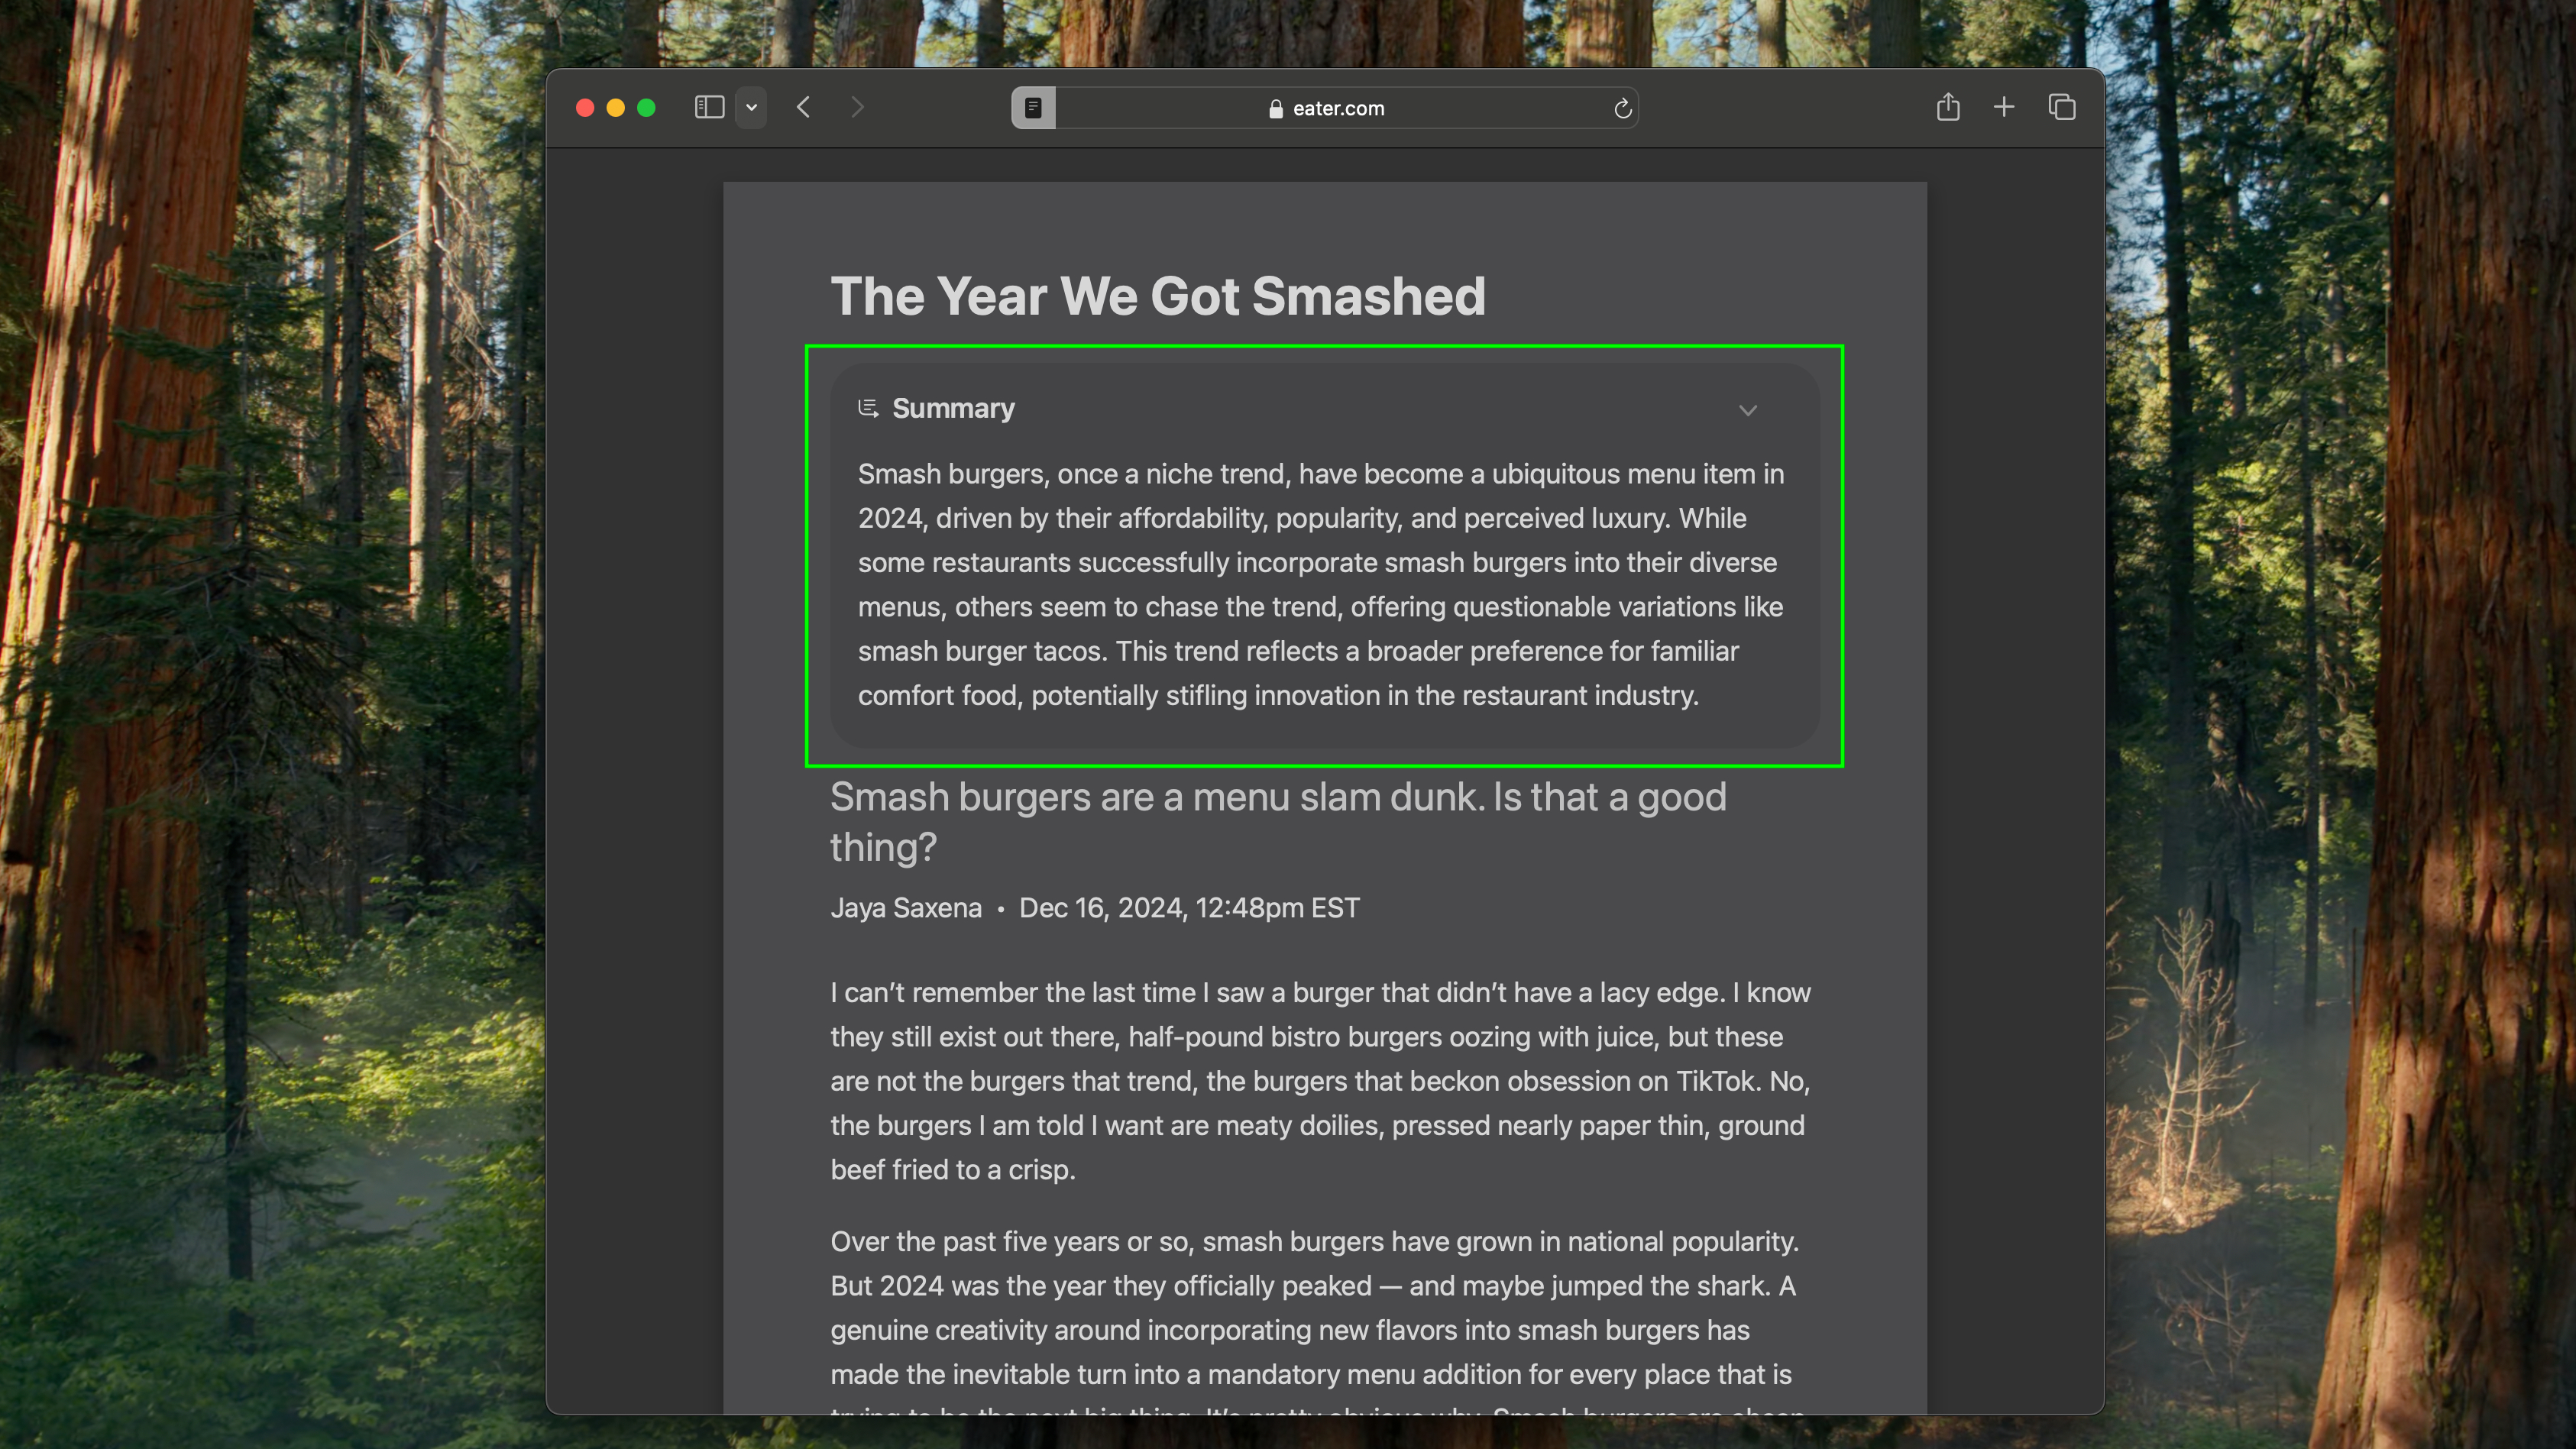
To do this, open the webpage you want to summarize in Safari. Next, click on the small page menu button to the left of the address bar (it looks like a small box with two lines at the bottom) and look for the large blue button that says “Show Reader.”
If you don’t see this button, it means Safari can’t convert the website to reader mode and summarize the text. But if you actually look at it and click on it, you’ll see the web page reformatted into a simple page with text. At that point, click the (Summary) button near the top of the page, and your Mac will immediately generate a short (about a paragraph long) summary of the page.
Summarize audio recordings
One of my personal favorite new Apple Intelligence features is the option to transcribe and summarize audio recordings on your Mac.
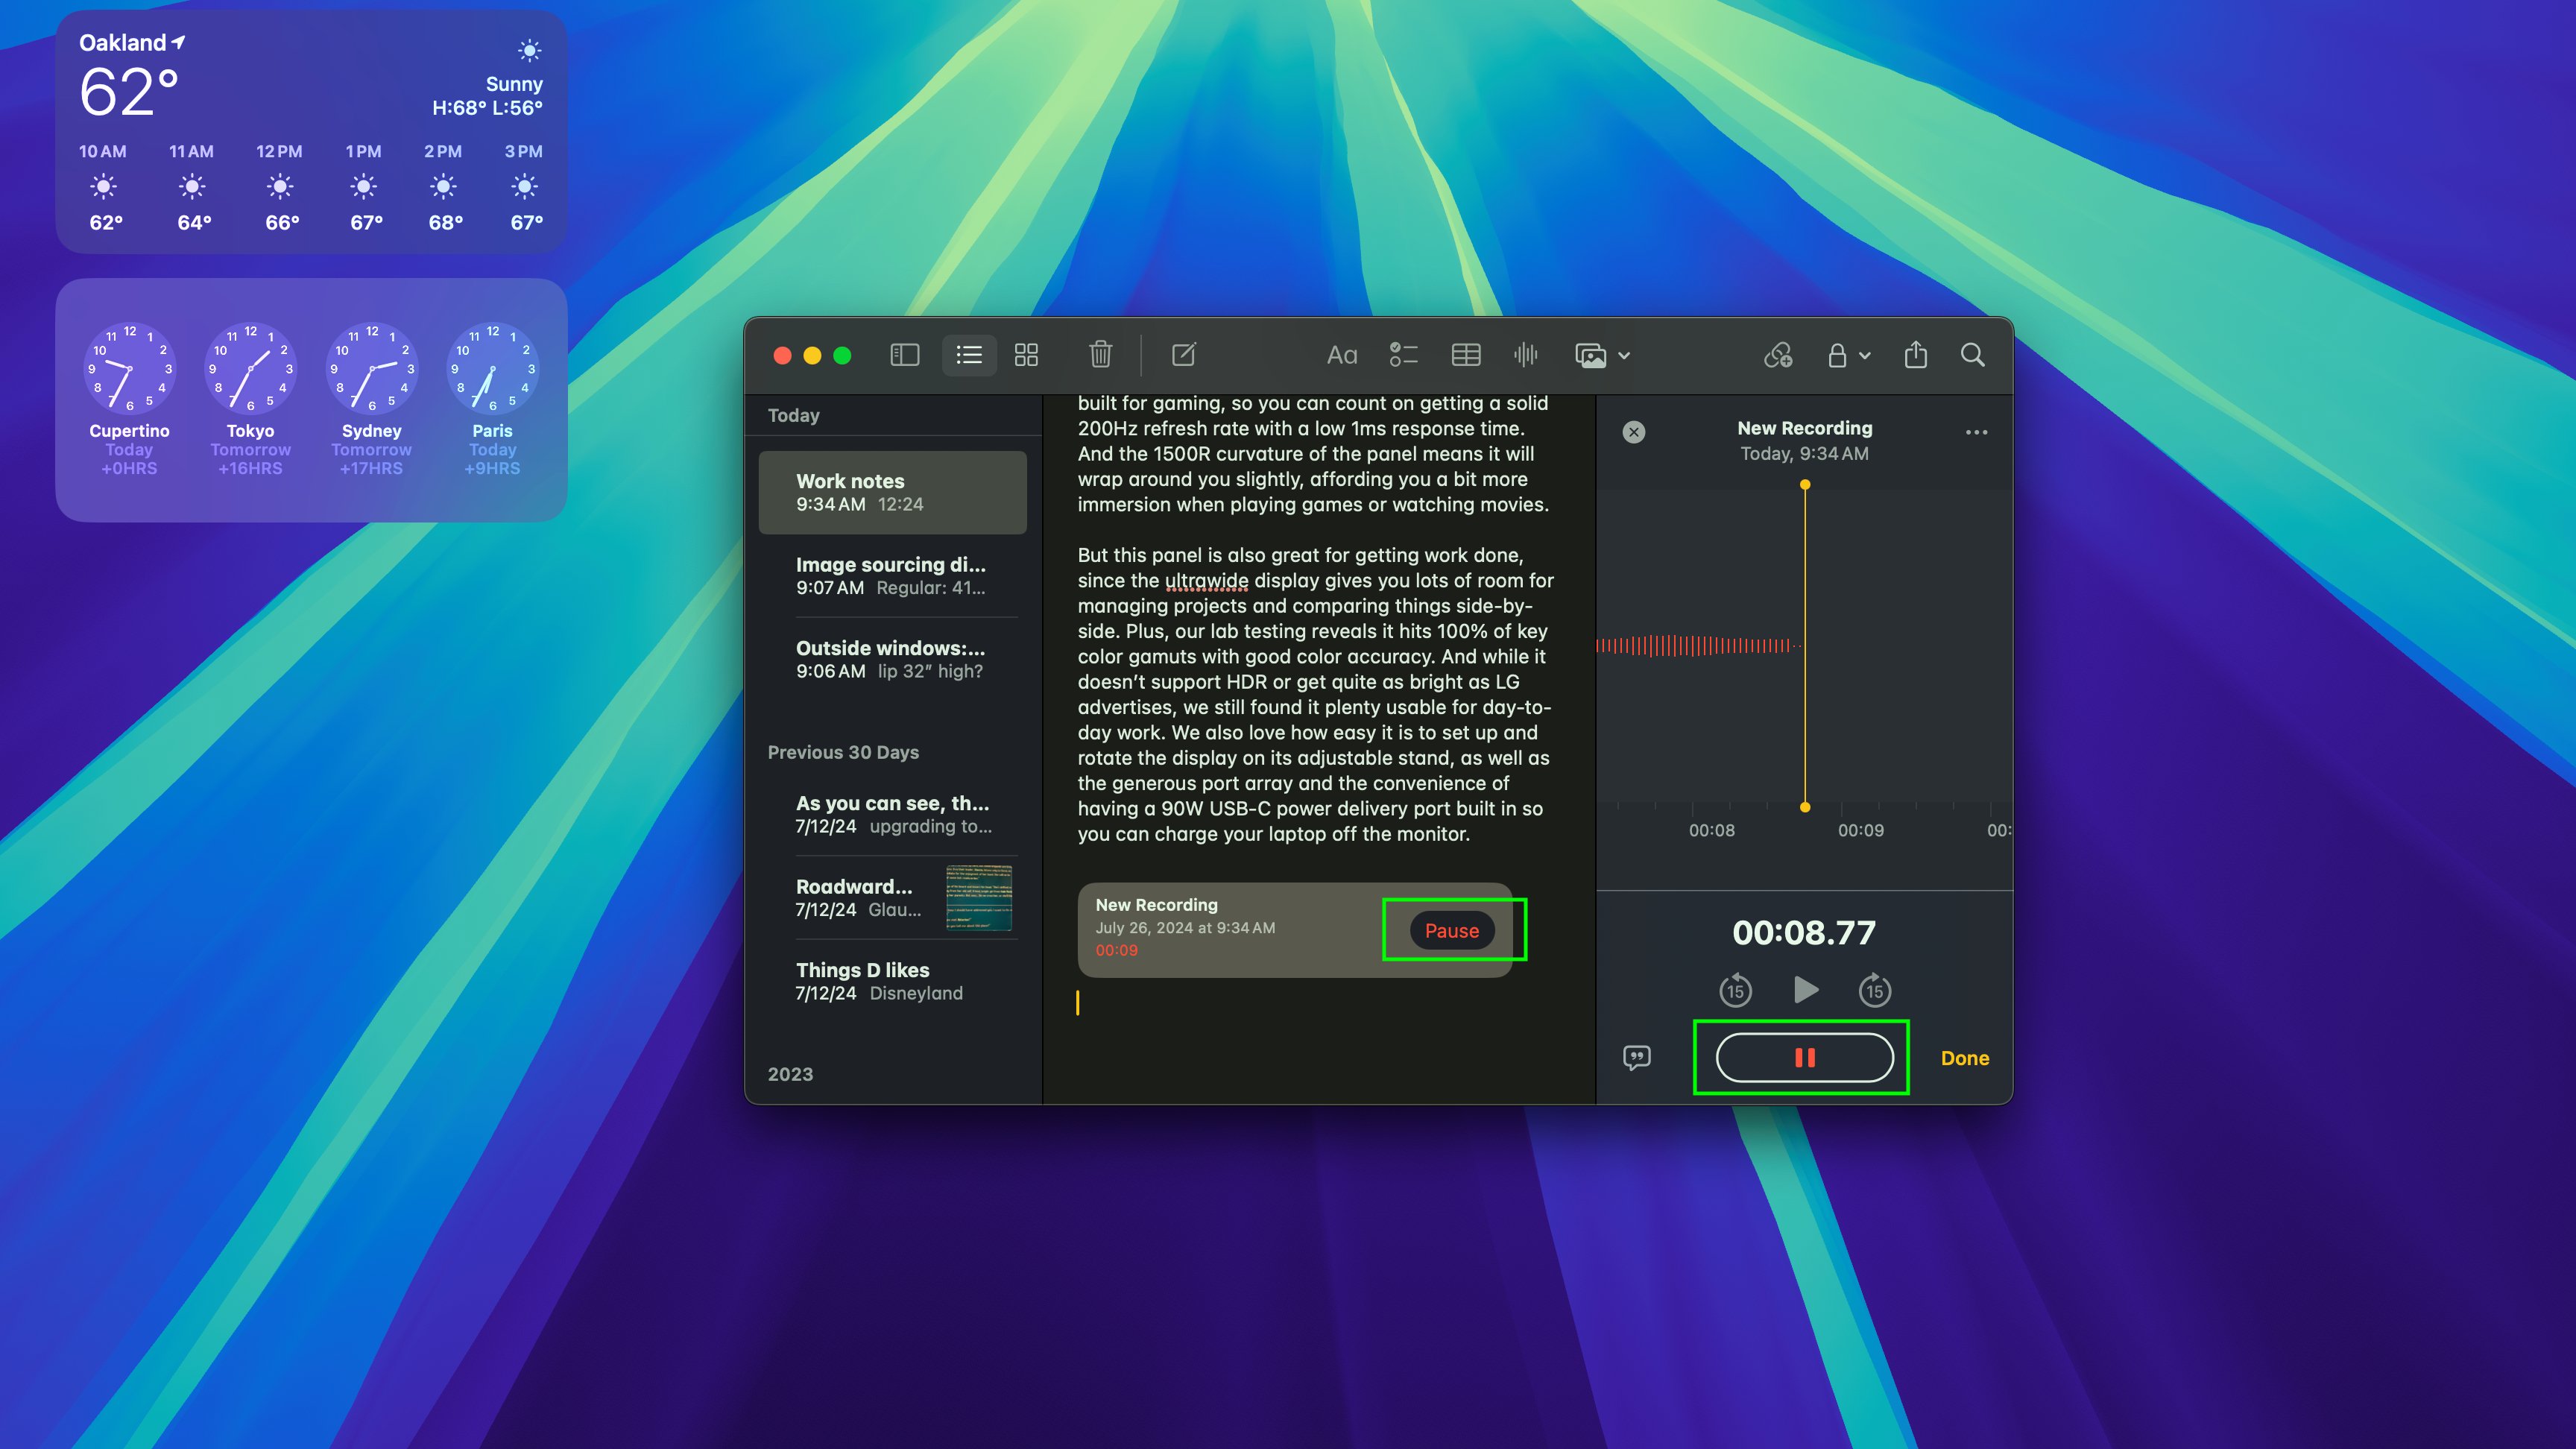
I like this feature because it makes it easy to organize the interviews and other audio recordings I make during my work as a journalist (see how to record audio in macOS Sequoia Notes).
However, anyone can benefit. These summaries allow you to transcribe your recordings word-for-word with great accuracy, and you can click on the text to jump to it and listen to the recording at that moment to see if what your Mac has transcribed is accurate. . or not.
This feature is available in the Notes app. You can access it by opening Spotlight Search (Cmd + Spacebar), typing Notes, and pressing Enter. Although you can use your MacBook to record your notes, I find it more convenient to record them on my iPhone and access the transcriptions on my MacBook Pro.
Use ChatGPT
If needed, you can enable ChatGPT functionality in macOS Sequoia. This is optional and allows you to access ChatGPT functionality through Siri instead of sending a request from your Mac to a ChatGPT server.
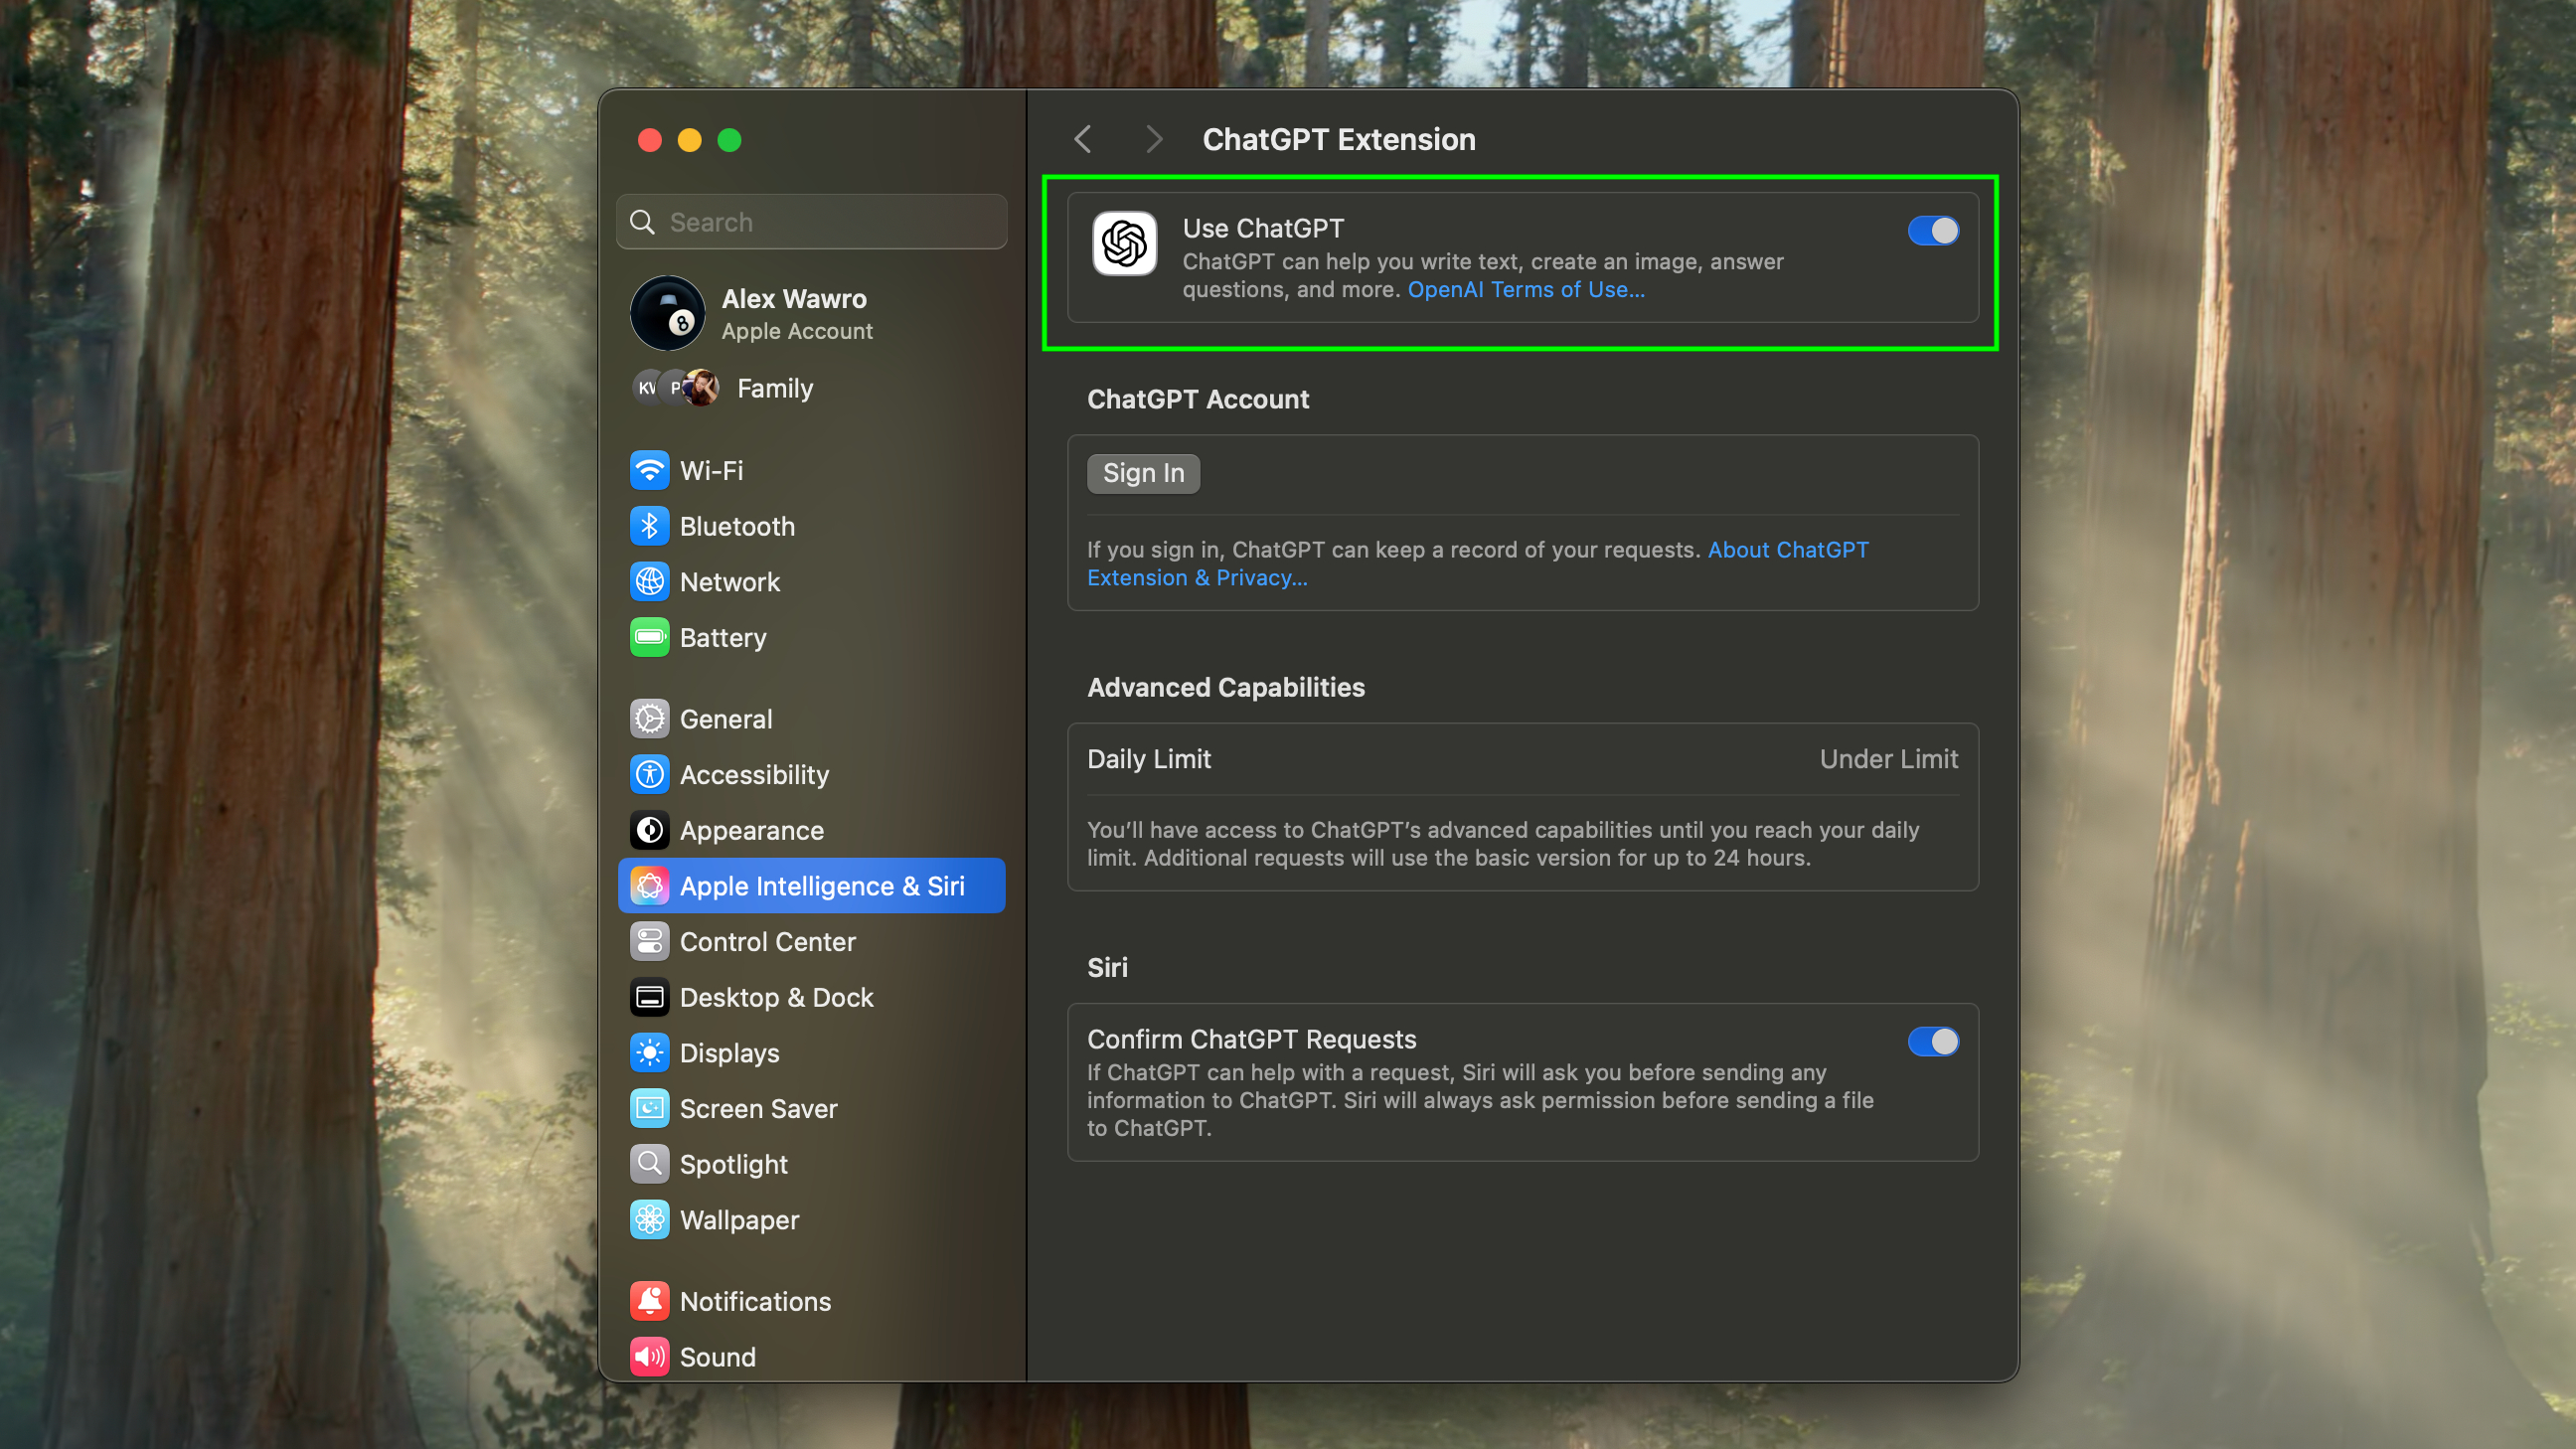
This helps you get additional features from Siri and is easy to enable. Return to the Apple Intelligence section of System Preferences (click the Apple icon in the top left corner and select System Preferences > Apple Intelligence & Siri) and scroll down to the Extensions section. Click ChatGPT and make sure the Use ChatGPT feature is enabled.
At this point, you can use ChatGPT’s advanced features with Siri, up to a certain limit. There is a daily limit on the number of times you can access it in a 24-hour period, and if you exceed that limit you can still access ChatGPT features, but only in the basic version.
If you have a ChatGPT account, you can also sign in to your account. This allows ChatGPT to better track and remember your requests. This is recommended if you plan on using it frequently.
More Apple Intelligence features will be rolling out to Mac throughout 2025, so keep your Mac up to date and check back. For tips to get more out of your Mac, check out our step-by-step guides on how to select multiple files on your Mac, rename multiple files on your Mac, or set up iPhone mirroring in macOS Sequoia please.